Table of Contents
Introduction
Basket weaving is a timeless craft that blends creativity and functionality. Whether you’re a beginner or an experienced artisan, learning how to basket weave allows you to create beautiful, handmade baskets. In this guide, we’ll cover essential materials, popular types of weaving patterns, and a step-by-step tutorial to help you master this art.
Basket Weaving for Beginners
Basket weaving is a relaxing and creative hobby that anyone can learn. Whether you’re looking to make decorative home items or practical storage solutions, starting with basket weaving for beginners is a great way to enter the world of traditional crafts.
What Is Basket Weaving?
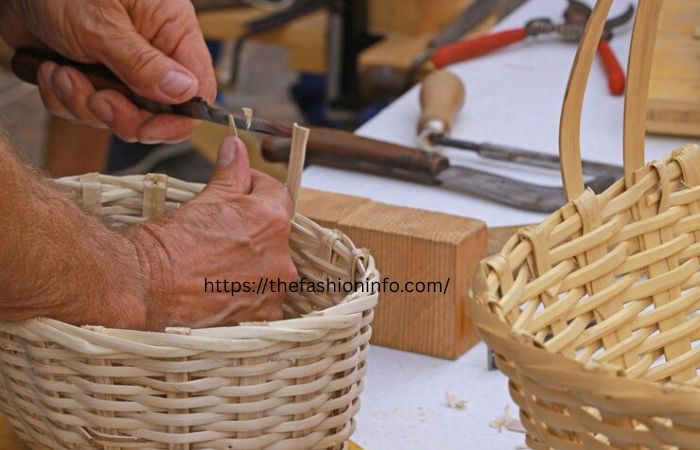
Basket weaving, also known as basketry, is the art of creating containers by weaving flexible materials like reeds, willow, bamboo, or even yarn. This ancient craft has been used by cultures around the world for thousands of years.
Why It’s Great for Beginners
-
Easy to Start: You only need a few tools and materials to get going.
-
Affordable Hobby: Most supplies are inexpensive or even available in nature.
-
No Experience Required: You can create your first basket with simple techniques like the over-under weave.
-
Therapeutic & Mindful: It’s a hands-on activity that helps reduce stress and boost creativity.
Basic Tools & Materials
To begin basket weaving, you’ll need:
-
Reeds, rattan, or even paper cords
-
A water basin (for soaking reeds to make them flexible)
-
Clothespins to hold parts together
-
Scissors
-
A simple mold or base (optional for shaping)
Simple Techniques for Starters
-
Over-and-Under Weave: This is the most basic method, perfect for flat and round baskets. You alternate weaving over and under the base spokes.
-
Twining: Great for strengthening your basket and creating a decorative effect.
-
Coiling: Involves stitching fiber in a spiral, often using yarn or raffia.
First Project Idea: Mini Round Basket
Start by making a small round basket with a flat base. Use the over-and-under method and a mid-rise wall to practice shaping. This project helps you get used to spacing, tension, and finishing techniques.
Helpful Tips
-
Soak natural materials in water to avoid breakage.
-
Keep your tension even—too tight or too loose can cause problems.
-
Don’t worry about perfection—every handmade basket is unique!
Materials Needed for Basket Weaving
Before you begin weaving, it’s important to prepare; therefore, start by gathering the following materials:
- Reeds or fibers – Common materials include rattan, willow, bamboo, and synthetic fibers.
- Basket mold (optional) – Helps shape your basket while weaving.
- Scissors – To trim excess fibers.
- Water container – Used to soak natural reeds to make them flexible.
- Weaving needle or awl – Helps guide and secure fibers.
- Clothespins or clips – Holds fibers in place as you work.
- Glue (optional) – Useful for securing ends.
Popular Basket Weaving Patterns
When learning how to basket weave, there are several techniques to explore; moreover, each method creates a unique and visually distinct design.
- Over-and-Under Weave – The most basic method, alternating fibers over and under.
- Twining Weave – Uses two strands that twist around vertical spokes.
- Coiling Weave – A spiral technique using a continuous fiber.
- Plaiting Weave – Involves interlacing strips to form a checkerboard pattern.
- Ribbed Weave – Features a strong central structure with woven sections.
Step-by-Step Guide: How to Basket Weave
Gather and Prep Your Materials for Basket Wave
- If using natural reeds, soak them in warm water for about 30 minutes to increase flexibility.
- Cut the fibers into appropriate lengths based on the desired basket size.
Creating Base
- Arrange your main support reeds (spokes) in a crisscross pattern.
- Secure the center with a knot or weave a few rounds to hold them together.
Begin the Weaving
- Start with an over-and-under weave, guiding the weaver (horizontal strand) through the spokes.
- Continue weaving, adjusting tightness to ensure an even shape.
Shape the Sides
- Gradually bend the spokes upward to form the basket’s walls.
- Maintain consistent weaving tension for a uniform look.
End the Top Edge
- When you reach the desired height, trim excess reeds.
- Secure the ends by tucking them under previous rows or using glue.
Adding Final Touches for Basket wave
- Let the basket dry completely if soaked materials were used.
- Apply a finish such as varnish or paint for durability and aesthetics.
Tips for a Perfectly Woven Basket
- Keep fibers damp but not overly wet to prevent breakage.
- Maintain even tension while weaving to avoid irregular shapes.
- Experiment with different weaving patterns for unique designs.
Conclusion
Now that you understand how to basket weave, you can confidently start creating both functional and decorative baskets. Whether you’re crafting a simple woven container or aiming for a more intricate design, basket weaving for beginners offers a rewarding experience. Not only does it enhance your creativity, but it also helps you develop practical skills. Furthermore, as you continue practicing, you’ll notice your technique improving and your designs becoming more refined. Ultimately, basket weaving allows you to combine art and utility in a fun, hands-on way.

